8 wet weather friendly hairstyles to keep the frizz at bay
Caught short in the rain? Keep frizz at bay with these easy hairstyles
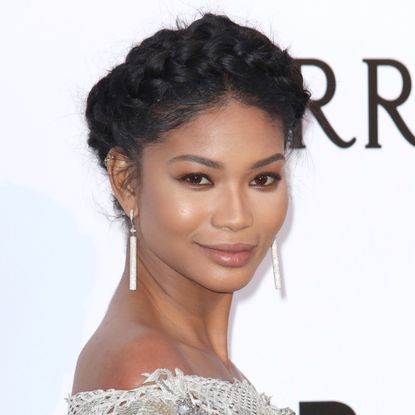

Caught short in the rain? Keep frizz at bay with these easy hairstyles
There's nothing more annoying than getting caught in the rain before you go to work/meet friends/go on a date. It's the perfect recipe for a disastrous 'do - unless you get handy with your hair.
Enter braids, buns and simple slicked back hairstyles that not only tame your hair, but keep annoying fly-aways and frizz under control. The best part? For most of them all you need is a small, soft bristle brush and a hair elastic.
We've scoured years of celebrity hairstyles to pick the absolute best 'dos to tackle whatever weather is thrown your way. If it's pouring with rain, Candice Swanepoel has a sleek bun that'll give any beach waves a run for their money in the style stakes. If it's windy, Chanel Iman has the perfect style to keep fly-aways at bay and if you simply don't have time to play around with your hair, Rooney Mara has a style that's so simple, it almost does itself, yet so beautiful, it's red carpet ready.
Don't let the weather get the better of you. Arm yourself with these weatherproof hairstyles. Or give it some back up with a frizz fighting shampoo.
First up is the Double Braid, as shown by Hailey Baldwin. If your hair is unruly, these braids will keep it under control.
1. Divide your hair down the centre and secure the half of your hair that you're not using with an elastic to keep it out of the way.
Marie Claire Newsletter
Celebrity news, beauty, fashion advice, and fascinating features, delivered straight to your inbox!
2. Gather a small section (of the section you left unbound) at the front of your hairline and separate into three sections (right, middle, left) close to your roots.
3. Weave the right section across the middle, so now the middle section is the right section.
4. Now weave the left section over the new middle section, so it becomes the middle.
5. Before you start again, add an inch of hair to the section on the right and left, so you're picking up more hair as you go.
6. Repeat the process until you've added in all of the remaining hair on one side.
Best hairstyles for wet weather
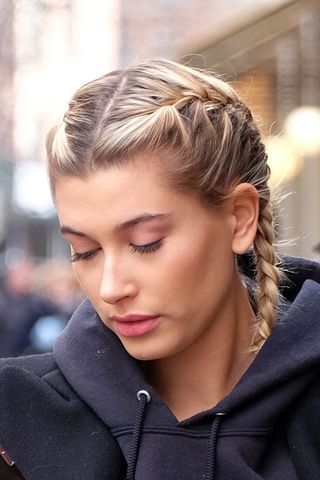
7. Repeat with the other side. Now you've got your rain-proof look, give it some back up with a frizz fighting shampoo. Our sister site Powder will help you find the best one.
Sleek Bun
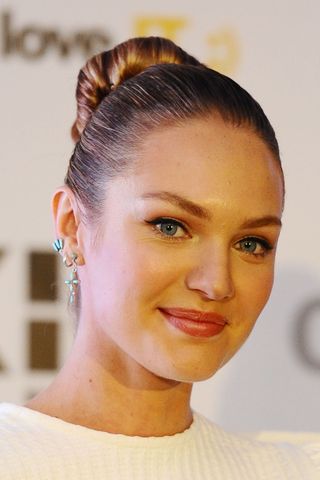
There's getting slightly damp and then there's getting fully drenched. If the latter happens to you, make like Candice Swanepoel and brush your hair back into a sleek bun.
2. Tie hair up into a ponytail. Aim for the crown of your head (the point at the top of your head where the curve begins to start). This is your most naturally flattering position.
3. Twist your ponytail clockwise until it begins to curl up.
4. Using the same direction, wrap your ponytail around itself in a circular formation.
5. With another hair elastic, tie around the base of your bun, making sure to include the hair you've just wrapped around.
Failing that, why not nail how to do a messy bun instead?
Halo Braid
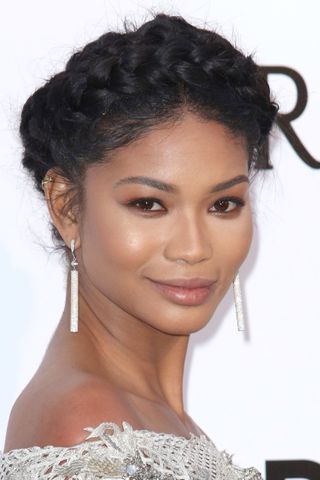
If you have long hair, try Chanel Iman's halo braid. It looks tricky, but it's actually really easy to do, so go plait!
2. Working with one section, divide it into three equal parts.
3. Starting at the top of your ear, plait your hair by taking the right section over the middle section (so it becomes the new middle section) and then the left section over the middle (so now it becomes the new middle section).
4. Repeat this process until the full length of your hair has been plaited and secure with a clear elastic at the end.
5. Plait the other side the same way so you have two plaits.
6. Take the right plait and fold it over your head - securing in place with a kirby grip.
7. Now, take the left plait and fold it over the top of your other plait - securing it in place with kirby grips.
Topknot
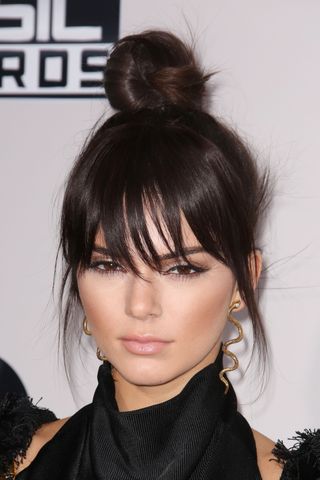
The topknot is our go-to for almost every bad hair day we have. It's easy, takes hardly any time and somehow manages to look sensational every time. If you want something quick and simple, try Kendall Jenner's look.
2. Twist your hair clockwise until it naturally starts to twist around itself, forming a knot.
3. Secure with a hair elastic.
Side Part Plait
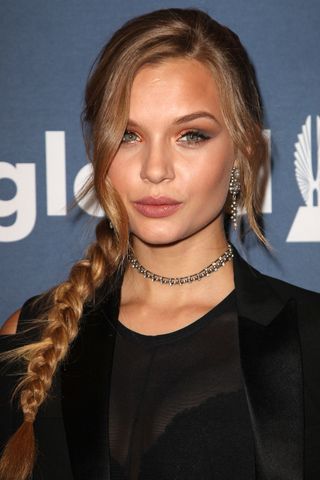
A side part adds a bit of old school glamour to any hairstyle and a plait will control frizz.
2. Flick hair over so you have a clean part down the side.
3. Plait hair at the back, bringing it down to the same side where your hair has most volume and secure at the end with a hair elastic.
Dual Texture

Stay ahead of the curve with this party season favourite, as shown by Rooney Mara. It's all about sleek at the top and volume at the ends, so you don't have to worry if it rains on your roots.
2. Comb down so that the top of your hair is quick sleek.
3. Scrunch the ends of your hair to break it up and create a bit of texture.
Half Up
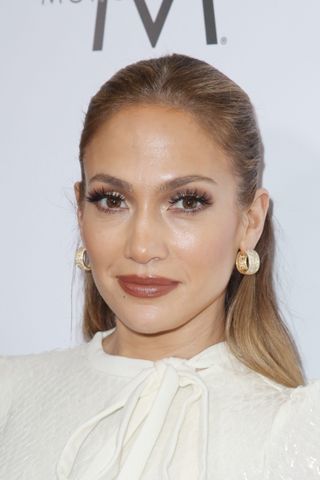
When you go to all the trouble of making your hair glossy, the last thing you want to do is tie it all up. Thankfully, your hair underneath should still be ok, so try a half up hairstyle by dividing it in half and simply tie up the top section à la Jennifer Lopez.
2. Brush the top section backwards and gather at the crown of your head.
3. Secure your hair here with a hair elastic.
4. Brush out the bottom section.
Slicked Back
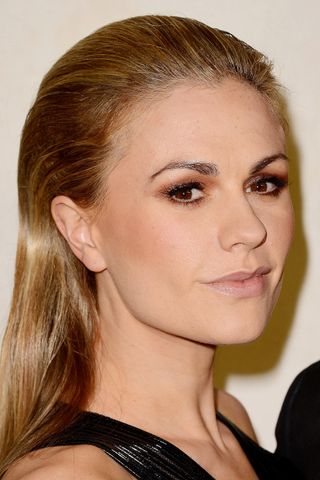
If you don't have a hair elastic on you, or simply don't have time to play around with your 'do, make like Anna Paquin and just comb your back off your face.
2. Set in place with VO5 Ultimate Hold Weather Resistant Hairspray, £1.89.
-
 Zendaya's reaction to awkward kissing question during Challengers interview has gone viral
'Uncomfortable' doesn't begin to cover it
By Iris Goldsztajn
-
 Prince William feels 'immense responsibility' amid Kate and Charles cancer diagnoses
He has a lot on his plate
By Iris Goldsztajn
-
 Taylor Swift just teased a 'timetable' for her new album release
The wait is torture
By Iris Goldsztajn